Excuse his jersey!
OR – for a simpler version, check this out:

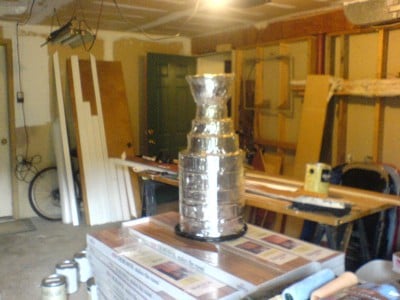
Canucks fans have been going wild celebrating the team’s quest for the Stanley Cup; they’ve donned jerseys, painted faces and some have even made their own version of the holy grail of hockey.
Jules Fransisco, a visual arts student from Emily Carr University, gave ctvbc.ca some tips and tricks for building the simplest, most economical homemade Cup.
What you’ll need:
Raid your garage (or make a quick trip to the store) and chances are you’ll have everything you need to make your own hockey holy grail.
“The Cup is pretty simple, so it’s easy to break it down into its three main pieces,” Fransisco said.
* Base: one large cylindrical object – small garbage cans, round gift boxes or watercooler jugs all work well
* Neck: one shorter, smaller cylinder – Tupperware containers or aluminum cake pans work well
* Top: one bowl
* Tape or glue
* Aluminum foil, silver gift wrap or silver spray paint
How to:
1. Begin building your creation by attaching the neck of the Cup to the base using either duct tape or hot glue. Fransisco says it’s best to use lots of adhesive in order to make sure the pieces are firmly attached. Then affix the bowl to the top of the neck, again using lots of tape or glue.
2. Once the three pieces of the Cup are assembled, you can start adding some shine to your trophy. Wrap aluminum foil around the base, taping and gluing in place. Then proceed to wrap the neck and bowl as well.
3. At each stage, be careful to tuck the foil around all the edges and contours and pinch into place. Glue ends of the foil into place: You don’t want loose pieces that can get caught and torn off your creation. And don’t worry about crinkles, they’ll give your DIY Cup an engraved look.